
How to Combine Images into One PDF: A Step-by-Step Guide

Lina
Chief Editor
Combining images into a single PDF is a handy way to organize and share multiple pictures in one compact file. Whether you're creating a photo album, compiling scanned documents, or preparing materials for work or school, learning how to combine images into one PDF can save you time and effort.
If you have tried Save as on a folder of photos, you know the problem: you get one file per image, not one document. The fix is to print the images to a PDF instead. Windows, macOS, iPhone and Android all have a PDF printer built in, so there is nothing to install.
In this guide, we'll walk you through the steps to merge images into a PDF on each device, then online, and show you how to get the page order, margins, quality and file size right.
How to Combine Images into One PDF
Here are the best methods to combine images into a single PDF on various devices:
1. Using Built-In Tools on Windows
Windows users can easily merge images into a PDF without additional software.
- Organize Your Images: Arrange your images in the desired order in a folder. Windows prints them in the order File Explorer sorts them, so if the order matters, put a number in front of each file name (
01-cover.jpg,02-page.jpg) and sort by name. - Select the Images: Highlight all the images you want to include in the PDF.

- Right-Click and Choose "Print": On Windows 11, click Show more options first if Print is not in the menu.

- In the Print dialog box, select Microsoft Print to PDF as the printer.

- In the Print dialog box, select Microsoft Print to PDF as the printer.
- Adjust Settings: Choose the paper size and layout (e.g., portrait or landscape). Full page photo gives you one image per page. Fit picture to frame crops each photo to fill the page; untick it to keep the whole photo with a white margin. Leave Quality on the highest value unless file size is a problem.

- Save the PDF: Click Print and choose a location to save your PDF.

The same dialog opens from the Photos app: select the pictures and choose Print from the ... menu. That is handy when the photos are spread across several folders.
2. Using Preview on macOS
Mac users can use the built-in Preview app to combine images into a PDF.
The fastest route skips Preview: select the images in Finder, right-click, and choose Quick Actions > Create PDF. A PDF appears in the same folder, pages in Finder's order. Use Preview when you want to check the order before you save.
-
Open Images in Preview: Select all the images, right-click, and choose Open With > Preview.

-
Reorder the Images: Drag and drop the thumbnails in the Preview sidebar to arrange them. If the sidebar is hidden, turn it on with View > Thumbnails.

-
Export as PDF:
- Go to File > Export as PDF.
- Name your file and choose a save location.

To set the paper size or orientation, use File > Print instead and pick Save as PDF from the PDF menu in the bottom-left corner of the print sheet.
3. Using Online Tools
For a quick and hassle-free solution, online tools are a fantastic option. One of the best platforms for this task is StaticFast.
Every online converter receives a copy of your pictures and keeps it for some period, so read the tool's limits and retention policy, and keep ID scans and signed forms on the built-in methods above. Here is what our tool does: the images are uploaded to StaticFast's server, each one up to 1 MB in JPG or PNG format, scaled to the width of the page in the order you set. The uploads and the generated PDF sit in a folder that belongs to your session only, and a scheduled cleanup deletes that folder once it has been idle for an hour.
Steps to Combine Images into One PDF Using StaticFast:
- Visit StaticFast PDF Combiner.
- Click the Browse button and select the files you want to combine. Or drag and drop your files to the upload zone.

- Arrange the images in your preferred order by dragging and dropping them.

- Click the Generate PDF button to generate the PDF.

- Download your combined PDF file to your device.

If all of your files are one format, see how to combine PNG into one PDF or how to combine JPG into one PDF for that format's quirks.
4. On iPhone, iPad and Android
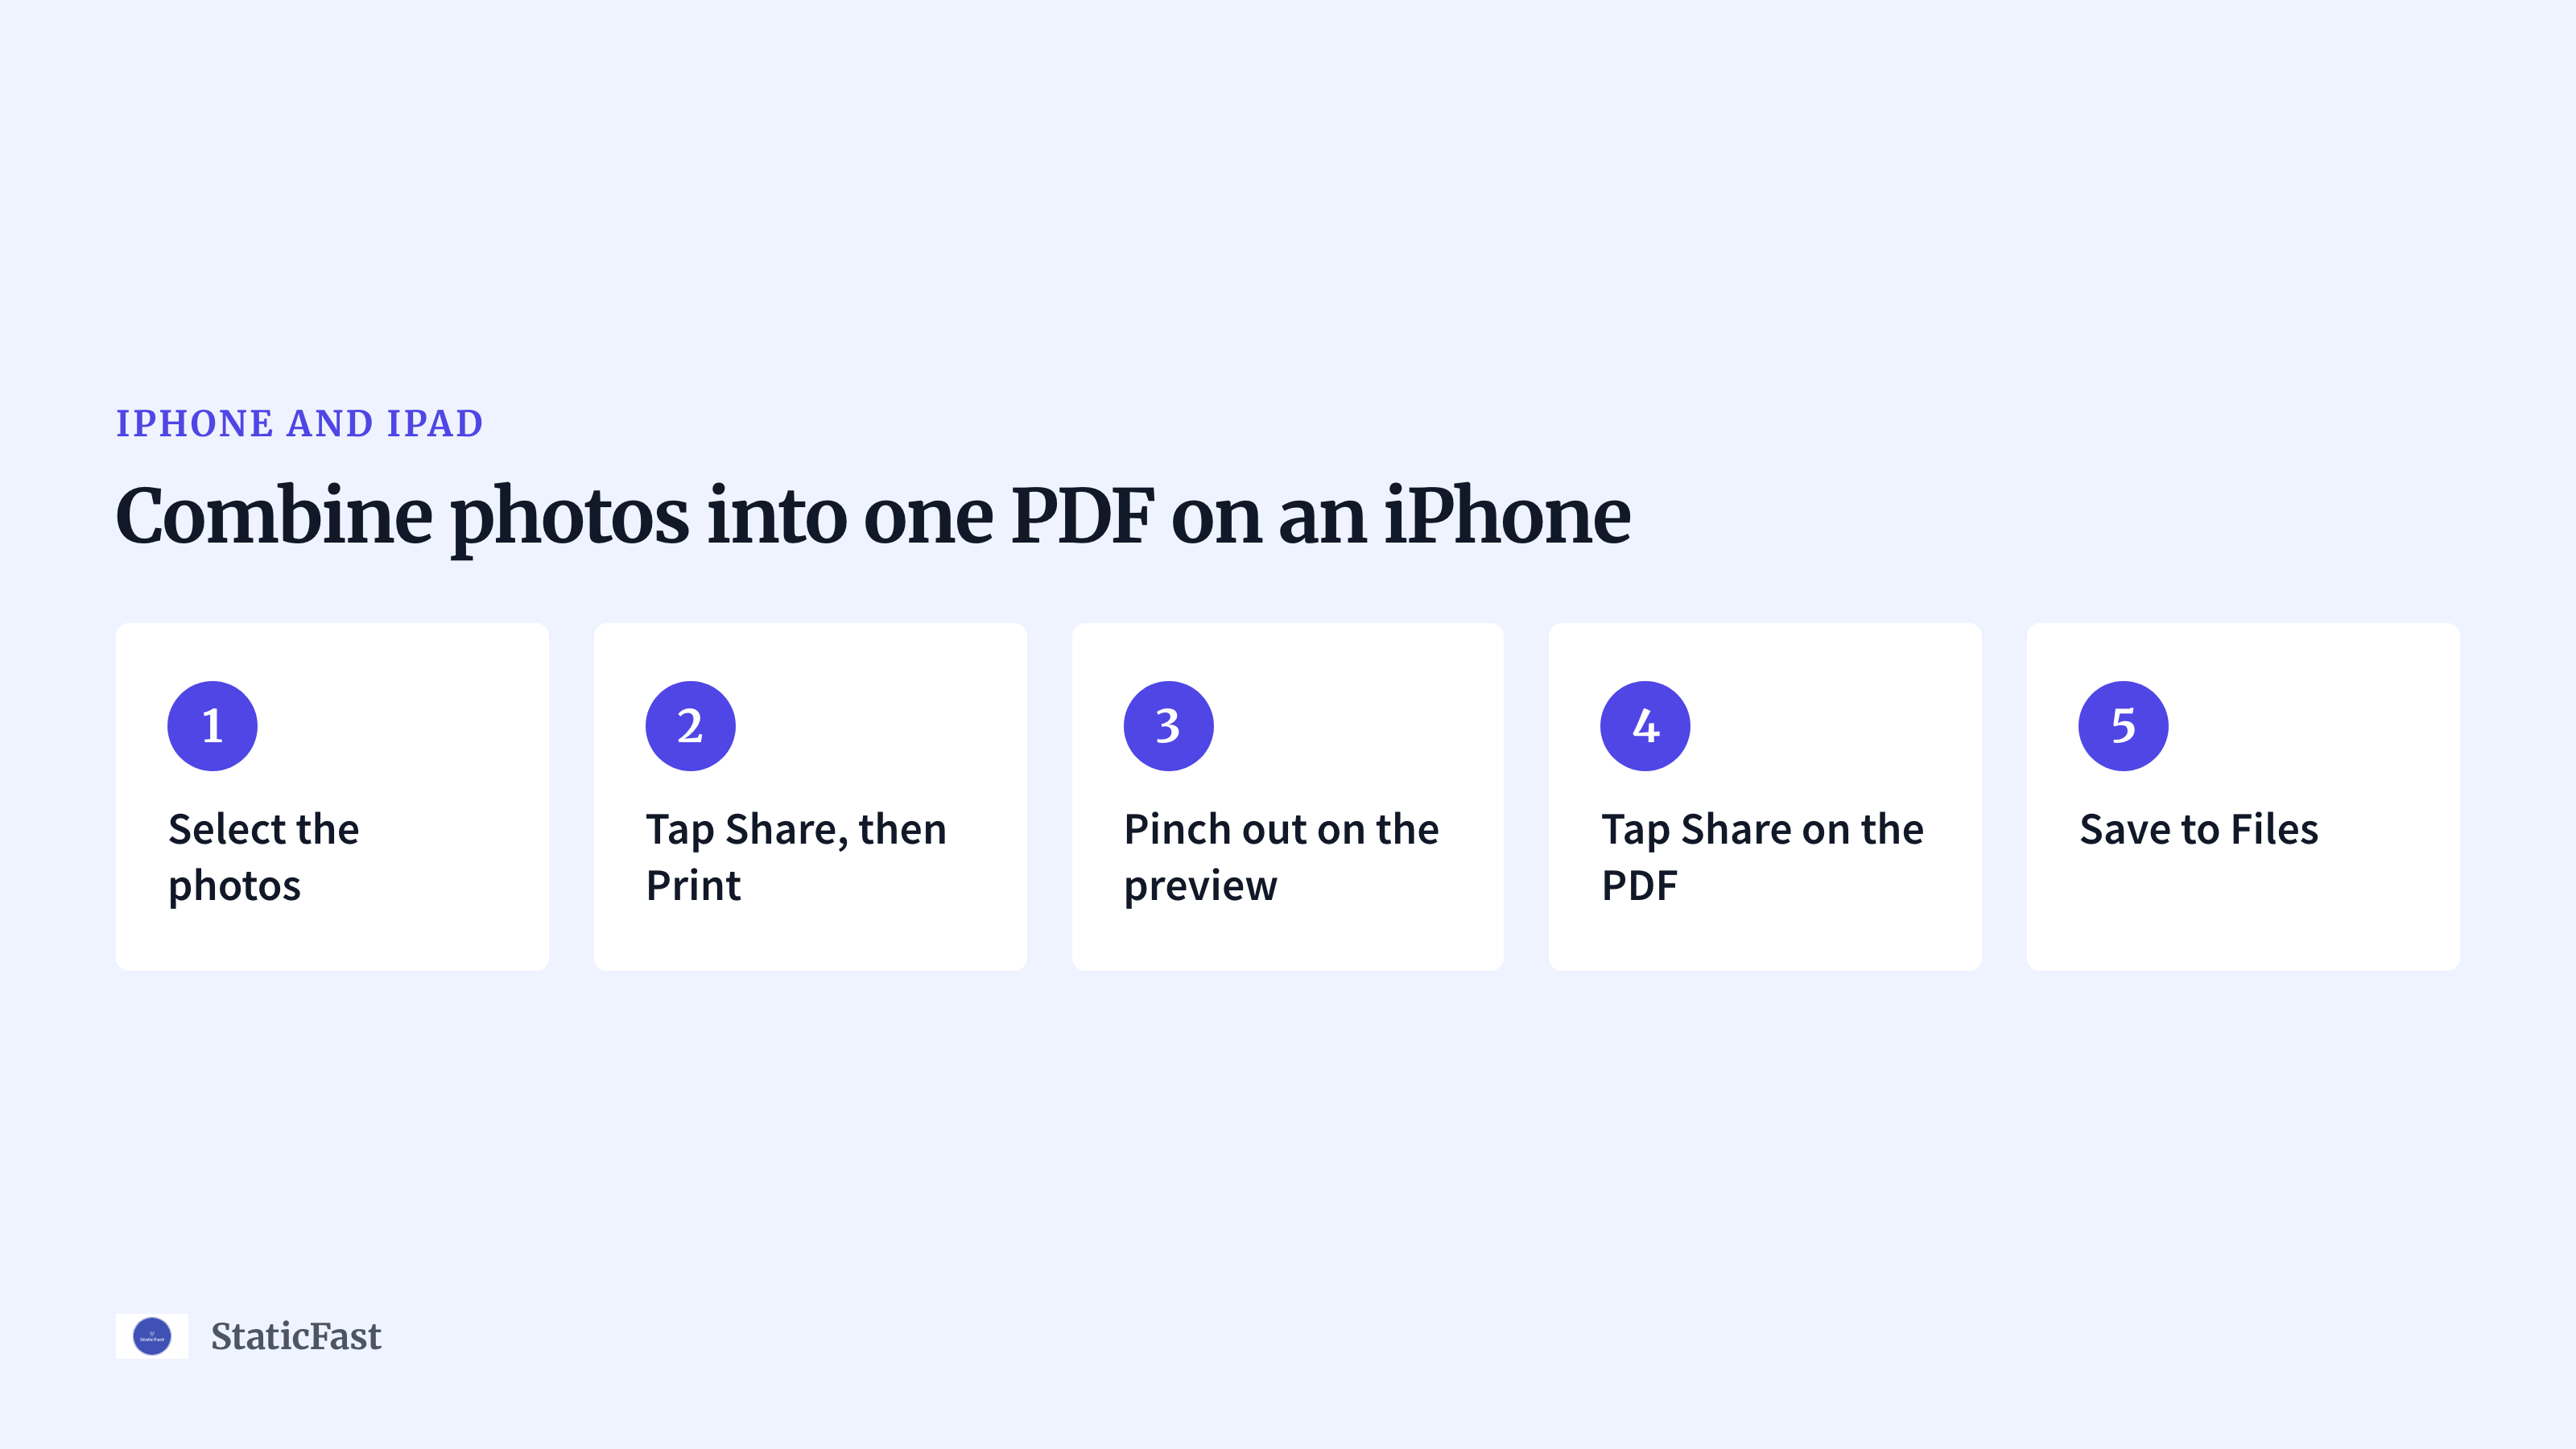
When the photos are already on your phone, make the PDF there. On an iPhone or iPad, the trick is hidden inside the print preview:
- Select the photos: Open Photos, tap Select, and tap each picture in the order you want them to appear.
- Tap Share, then Print: Print is near the bottom of the share sheet.
- Pinch out on the preview: Spread two fingers on the first page thumbnail. The preview opens as a full-screen PDF, one photo per page.
- Tap Share on the PDF: Use the share icon in the top-right corner.
- Save to Files: Pick a folder, or send the PDF straight to Mail or Messages from the same sheet.
If the images are in the Files app, select them, tap ... and choose Create PDF.
On Android, open Google Photos, select the pictures, tap ⋮ and choose Print. Pick Save as PDF as the printer, check the paper size and orientation, then save. For paper documents, use Google Drive instead: tap +, then Scan, and each scan becomes a page of one PDF with the edges straightened.
Page Size, Orientation and Margins
The print path decides how your photos sit on the page, and the defaults are not always what you want.
- Paper size: Pick A4 or Letter to match what your recipient prints on. On screen, both are fine.
- Orientation: A landscape photo on a portrait page gets a white band above and below it. If every image is landscape, switch the page to landscape. If they are mixed, keep portrait so the reader does not have to rotate the screen.
- Margins and cropping: On Windows, Fit picture to frame fills the page and trims the edges; untick it to keep the full image. On a Mac, the print sheet's Scale to fit lets you print the entire image or fill the paper. On a phone, the preview shows exactly what will be cut off, so check the corners before you save.
Here is how the four methods compare on the things people get stuck on:
| Method | Reorder pages | Page setup | Files uploaded |
|---|---|---|---|
| Windows Print to PDF | Rename files to set order | Paper size, fit to frame | No |
| macOS Preview | Drag thumbnails | Scale and orientation | No |
| iPhone or Android Print | Order of selection | Paper size, orientation | No |
| Online tool | Drag to reorder | Fits each image to page width | Yes |
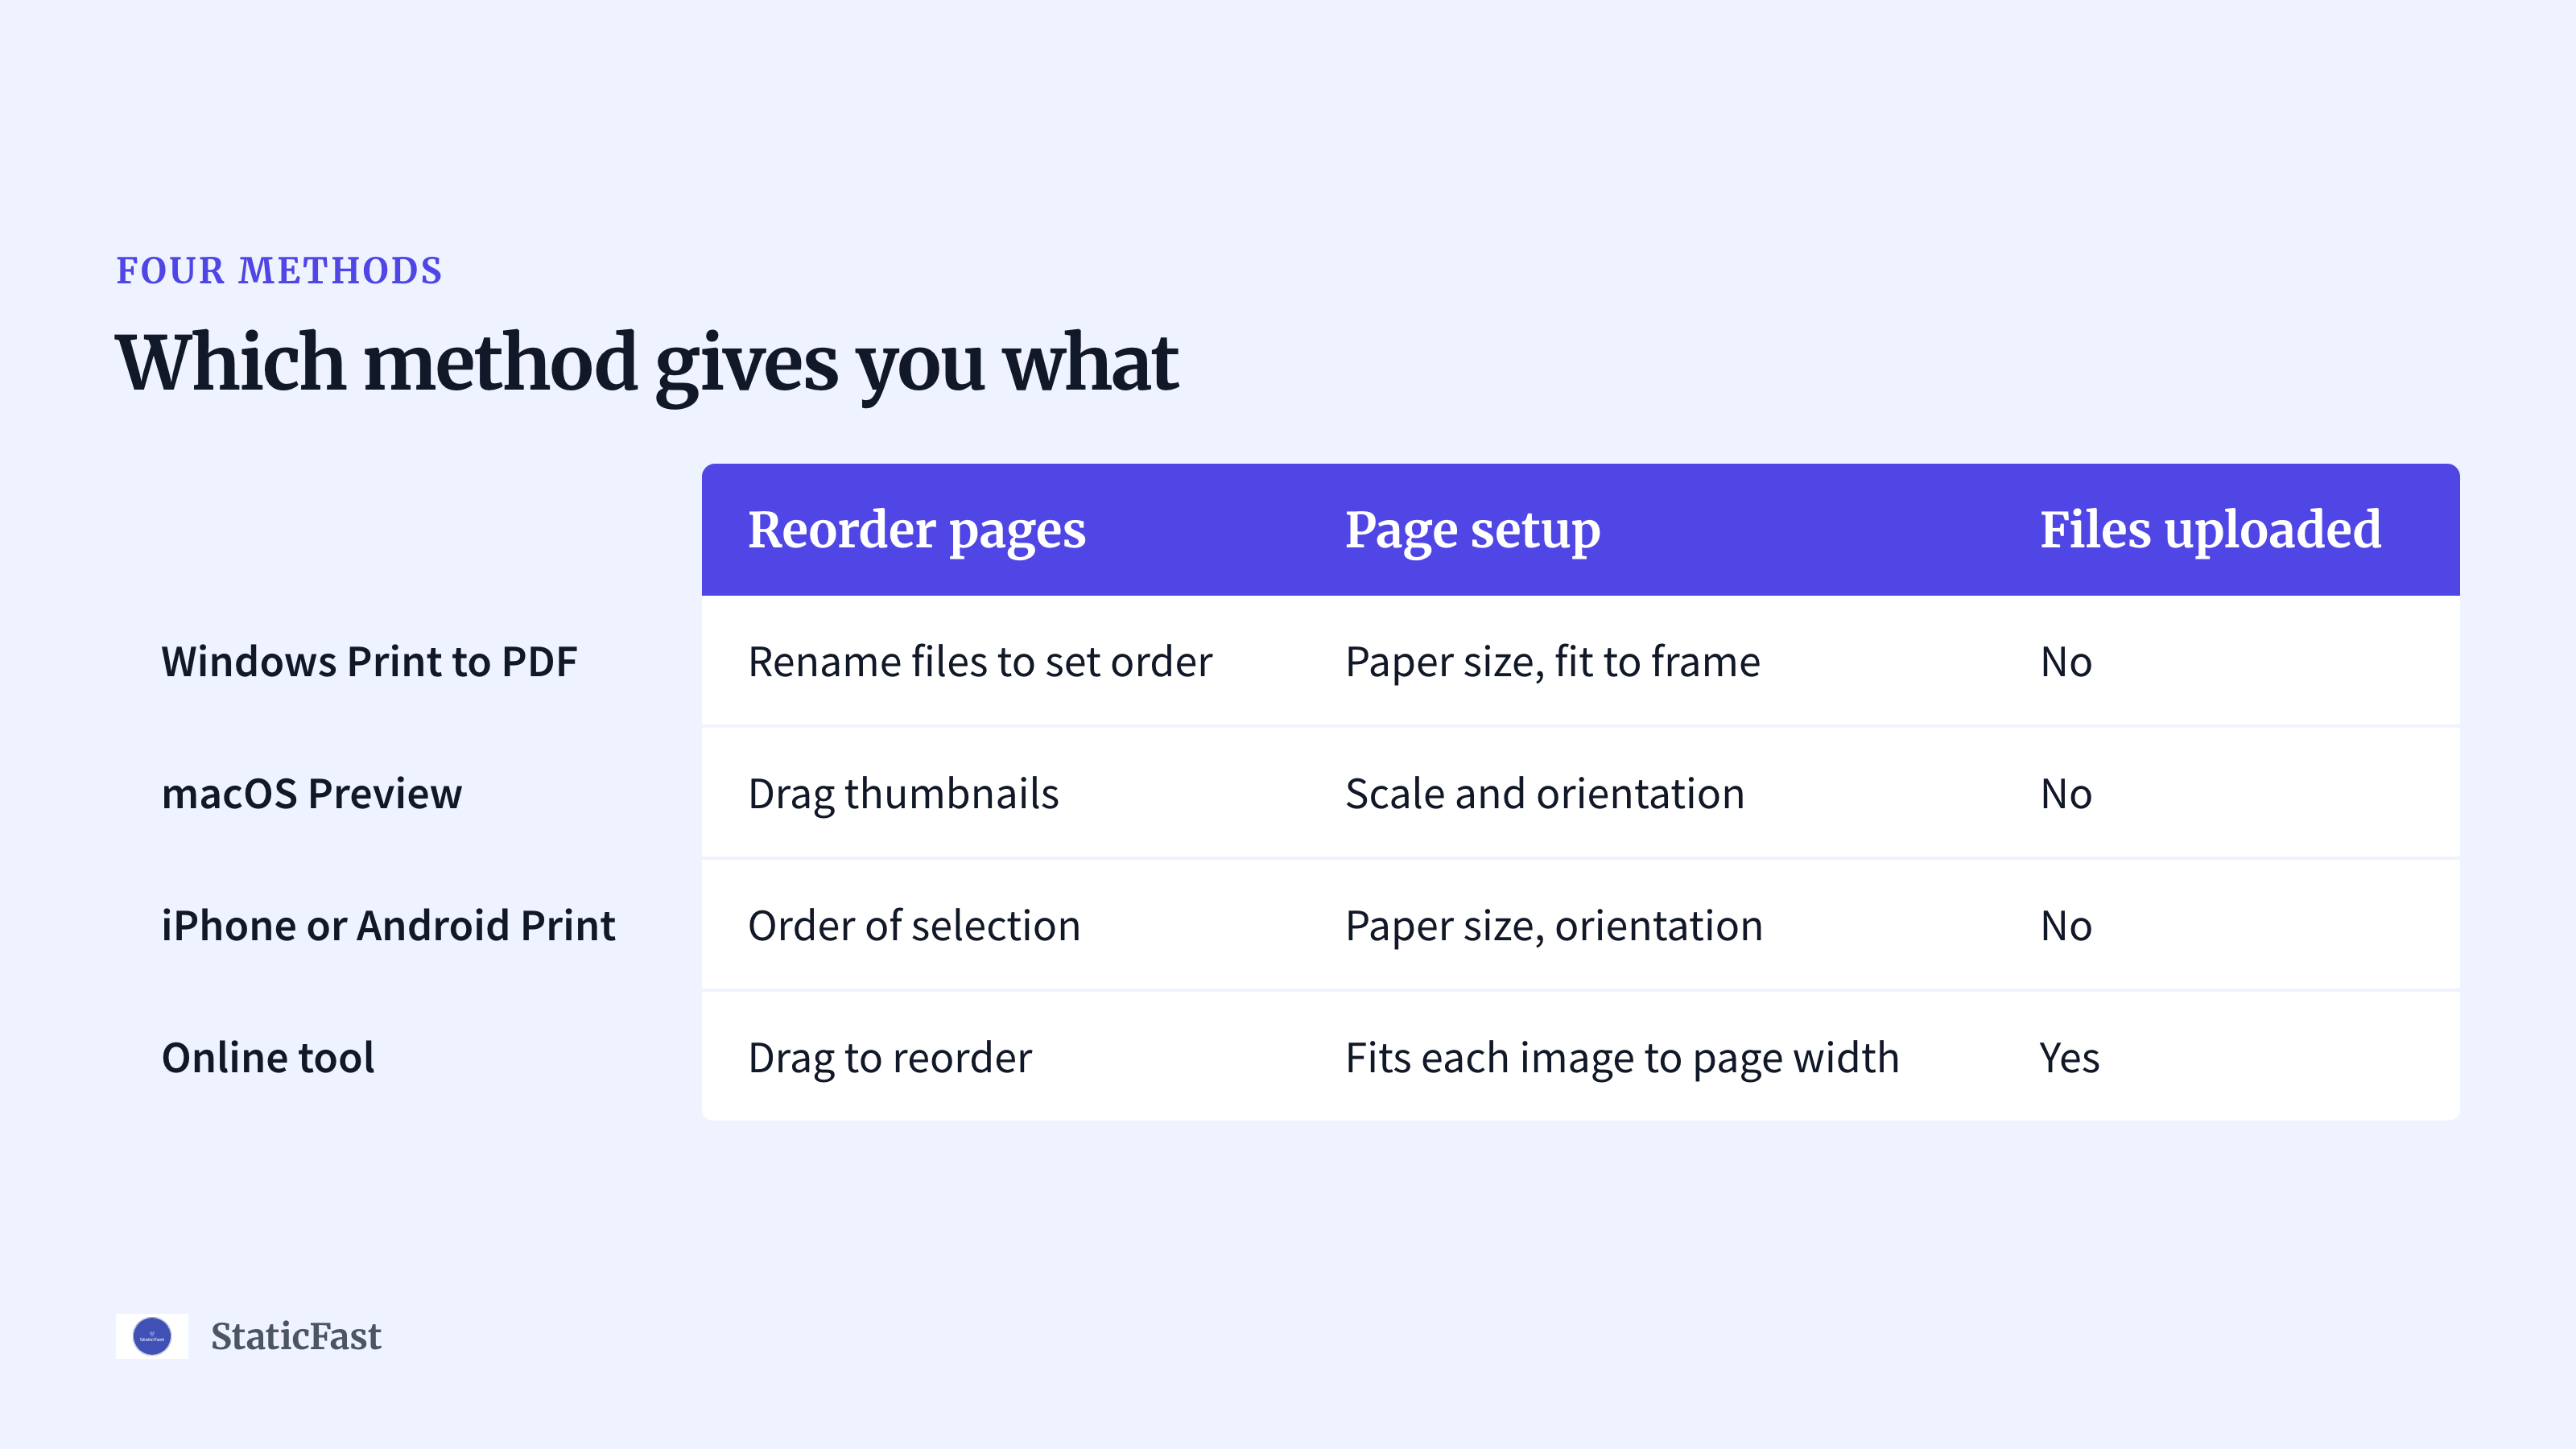
Image Quality vs. File Size
A PDF made by printing does not store your original files. The printer driver re-encodes each image at the quality it is set to, so the PDF can never look better than the images that went in, and the quality setting is where you trade sharpness for size.
- To keep the quality: Start from the full-resolution originals, not the copies a messaging app sent you, and leave the quality setting at its highest. Preview's Export as PDF keeps the images as they are, which is why its output is often larger than the Windows one.
- When the PDF is too big: Shrink the images before you combine them; a phone photo resized to the width of an A4 page loses nothing visible on screen. On a Mac, open the PDF in Preview and choose File > Export with the Reduce File Size filter. On Windows, lower Quality in the Print Pictures dialog and print again.
- If it is still too big: Split the set into two PDFs, or share a link to the file instead of the file itself. The next section covers that.
Every device you own can already print to PDF; use an online tool only when you cannot.
What to Do With the Finished PDF
Combining the images is usually step one: the scans go to someone, the portfolio gets handed in, the menu goes where people can open it.
- Email: Fine for a handful of pages. Mail providers cap attachment sizes, and a PDF of phone photos hits that cap quickly. If your message bounces, see what to do when a PDF is too big to email.
- A shared drive: Upload the PDF to the cloud storage you already use and send the share link. The recipient needs the right permission, and the link breaks if you move the file.
- A public link or QR code: If the PDF is for more than one person, host it. A hosted PDF opens in the browser on any device, the link survives when you replace the file, and a QR code can point at it. Our guide on how to host a PDF on your website walks through the options.
Why Combine Images into a PDF?
- Convenience: A single PDF is easier to share than multiple image files.
- Professional Appearance: PDFs look more polished and are ideal for presentations or official documents.
- Compatibility: PDF files are universally compatible across devices and operating systems.
Tips for a High-Quality PDF
- Optimize Images: Use high-resolution images for better clarity.
- Compress the PDF: If the PDF is too large, use a tool to reduce its size.
- Check the Order: Ensure the images are arranged correctly before finalizing.
FAQs
Q: Can I put several image files into a single PDF?
A: Yes. Select all of the images at once and print them to PDF; every method in this guide produces one PDF with one image per page. Only the order needs watching: it follows the file names on Windows, the thumbnails in Preview, and the order you tapped the photos on a phone.
Q: How long does an online tool keep my uploaded files?
A: It depends on the tool; most state it in their FAQ or privacy page. The StaticFast combiner keeps your images and the generated PDF in a folder tied to your session and deletes it by a scheduled cleanup once the folder has been idle for an hour. If you want no retention at all, use the built-in method on your own device, which never uploads anything.
Q: Can I edit the PDF after combining the images?
A: Yes, you can use PDF editing software like Adobe Acrobat or free tools like PDFescape to make changes.
Q: Are online tools safe for sensitive images?
A: Most reputable tools delete your files after processing, but for sensitive data, use offline methods.
Q: Can I combine images into a PDF on Linux?
A: Yes, you can use tools like LibreOffice Draw or command-line utilities like ImageMagick.
Conclusion
Combining images into one PDF is simple and efficient, regardless of your device or operating system. By following the steps outlined in this guide, you can create professional-looking PDFs in no time. When the PDF is for more than one person, host it and send the link instead of the file.
For more tips and tutorials on file management and productivity, check out our other articles!